(Or what you need to know if you’re having one fitted…)
Instagram is great. We love it. The reason? Because through images and text you can answer the most important questions in flooring and they all start with a “Why”? Why should you have a Herringbone floor? Why should you pay for a professional fitter? Why do oils matter? Most of us have heard of the “power of Why…” and Instagram nails it.
But where Instagram is not so good is dealing with “How”, and for flooring that’s just as important. This guide isn’t intended to be a DIY article, as unless you’re a DIY expert, fitting parquet is best left to professionals. However, we still think it’s important to understand the process; you can then make an informed decision on the best fitting strategy with your contractor.
We glue our Herringbones down
As we dealt with in a previous blog, there are two main ways of fitting a floor; floated or glued down. To give a more secure fit, and also make it easier to hold an accurate line when fitting, we glue Herringbones down with wood glues. This means the subfloor (so the structural part of the floor..) has to be a surface you can bond to. Normally, this is flooring grade plywood or a self-levelling compound. Our most common fitting strategy for floorboards is to staple 6mm ply, when a subfloor is concrete, we use levelling compound.
Note, we don’t glue directly to OSB boards or particle boards (cheaper forms of composite wood that contractors use to make subfloors).
Subfloor is key
At Kite, we’re based in East London, so we’re experts in Victorian Houses (lucky us…). Many of these have a subfloor (…or floorboards….) that look like a roller coaster. For the perfect Herringbone floor, your subfloor needs to be flat and ideally level. There are two ways of correcting this; you can i) remove the current floorboards, repair all the joists, and then fit new boards, or ii) level across the top of your uneven subfloor. The first option makes sense if you’re embarking on a larger building project, but if you’re just doing flooring, or the current subfloor is structurally sound, then levelling across the top makes sense. Sometimes we get lucky, and no levelling work is required, but in Hackney, this is very rare.


So what do we mean by levelling up?
No, this is not the latest Tory campaign slogan (… well actually it is…).
In flooring terms, our team will start by stapling 6mm flooring grade plywood boards to the subfloor. Onto this, they will then pour a fast-drying levelling compound, but as levelling compound is like water before they do this, they’ll seal any gaps between the ply, with either silicone or expanding foam. The levelling compound dries quickly, so, within 24 hours, you’ll have a subfloor ready to go.


And now for the fitting
Teams will start by setting a line out so that the rest of the floor can be fitted against it symmetrically. Often this will be in a hallway, so the line will run down the middle of the hall with even cuts on each side. It can also be down the centre of a room. Set your line out well, and everything will work, get it wrong, and your floor won’t look balanced. The floors are tongue and groove, so each Herringbone plank will be slotted into the next, forming the arrow pattern. Curves and walls will be dealt with by cutting down the planks to the appropriate size (you have to make a lot more cuts with Herringbone floors than plank).

So where do things go wrong?
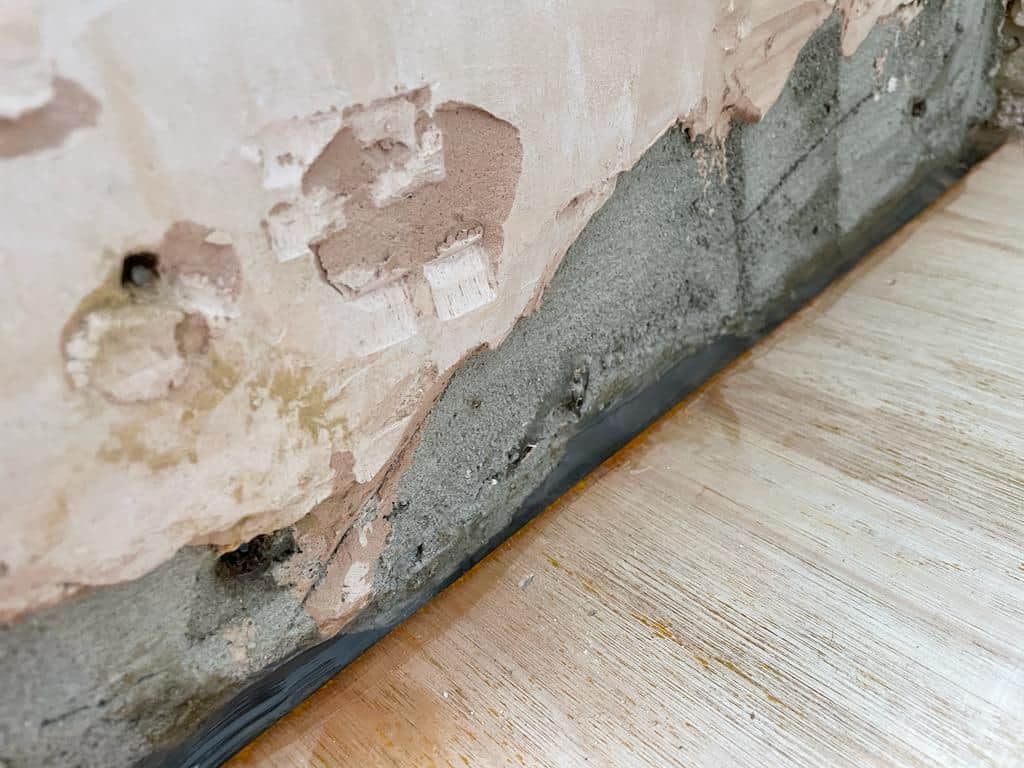
Problems mainly come down to the subfloor. If you try to fit on an uneven base, you will get movement and gaps in the floor. Have a perfect subfloor and things become easier. We also see floors where the line hasn’t been set out at the beginning correctly, or the tongues haven’t been properly fitted into the grooves. Finally, as this is a glue down floor be very careful with moisture; if you have residual moisture in concrete screeds or floorboards, it will cause problems. Make sure moisture levels are tested with a professional moisture reader before fitting.
Unlike laminates, these floors are projects for professional fitters (you can read about when you need one here). So if you’re considering a Herringbone floor, and your contractor doesn’t cover the things we mention here, be wary.
If you’re looking for help with a Herringbone floor, then get in touch. You can also view our patterned floor range here – Patterned floors.

YOUR FREE GUIDE TO BUYING A WOOD FLOOR
Kite Flooring have put together a comprehensive guide to buying a wood floor.
Many of your questions are answered in the guide.